Here are some common Nuke temporal adjustments nodes.
OFlow node
High quality retiming – slow-motion.
!Tip
We recommend using the Kronos node instead, particularly if you’d like to have the node run on the graphics processing unit (GPU) rather than the central processing unit (CPU).
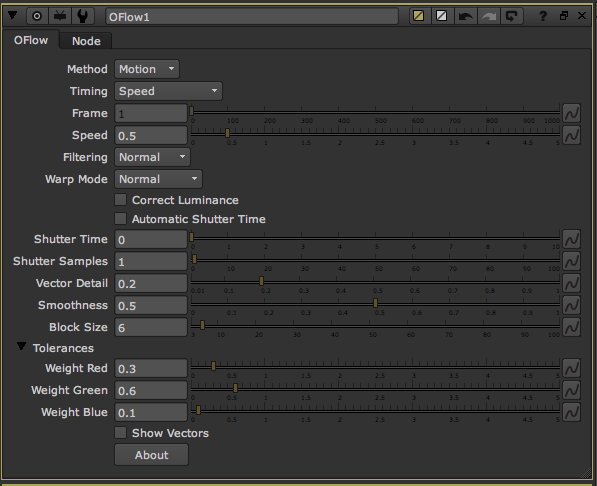
Filtering
Sets the quality of the filtering when producing in-between frames.
• Normal – uses bilinear interpolation which gives good results and is a lot quicker than extreme.
• Extreme – uses a sinc interpolation filter to give a sharper picture but takes a lot longer to render.
Warp Mode
Sets how to control the new timing of the clip.
• Simple – this is the quickest option, but may produce poor results around moving objects and image edges.
• Normal – this is the default option with better treatment of moving objects and image edges.
• Occlusions – this is the advanced option which attempts to reduce the level of background dragging that occurs between foreground and background objects.
Correct Luminance
Local motion estimation is highly dependent upon the idea that the brightness of objects doesn’t vary through a sequence. Where brightness varies rapidly – for example a highlight moving across the bodywork of a car – the motion calculation performs poorly. The luminance of a shot can come from other sources too – such as an overall flicker problem. In these cases where there is a global luminance shift, toggling this control on allows the local motion estim- ation algorithm to take account of overall brightness changes between frames.
Shutter Time
Sets the equivalent Shutter Time of the retimed sequence. A shutter time of 1 is equivalent to averaging over plus and minus half an input frame which is equivalent to a shutter angle of 360 degrees. A shutter time of 0.5 is equivalent to a shutter angle of 180 degrees. Imagine a gray rectangle moving left to right horizontally across the screen. The figures below show how Shutter Time affects the retimed rectangle.
Vector Detail
Adjust this to vary the resolution of the vector field. Large vector fields take longer to process, but contain more detail and may help to isolate smaller motion in the scene. A value of 1 gen- erates a vector for every pixel. A value of 0.5 generates a vector at every other pixel. For some sequences, a high vector detail near 1.0 generates too much unwanted local motion detail and often a low value gives a better result.
Smoothness
Vector fields usually have two important qualities: they should accurately match similar pixels in one image to another and they should be smooth rather than noisy. Often it is necessary to trade one of these qualities off against the other. A high smoothness misses lots of local detail, but is less likely to provide you with the odd spurious vector. A low smoothness concentrates on detail matching, even if the resulting field is jagged. The default value of 0.5 should work well for most sequences.
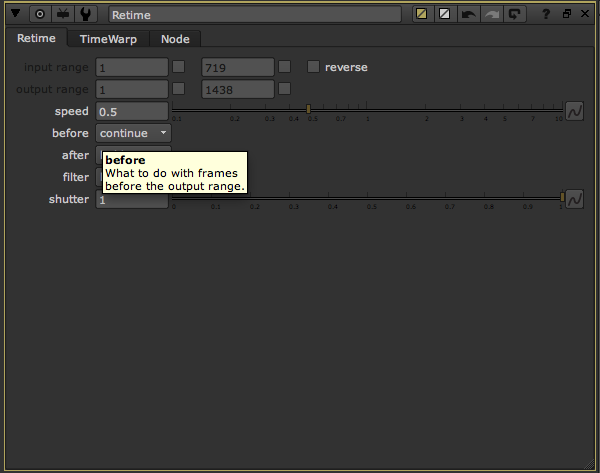
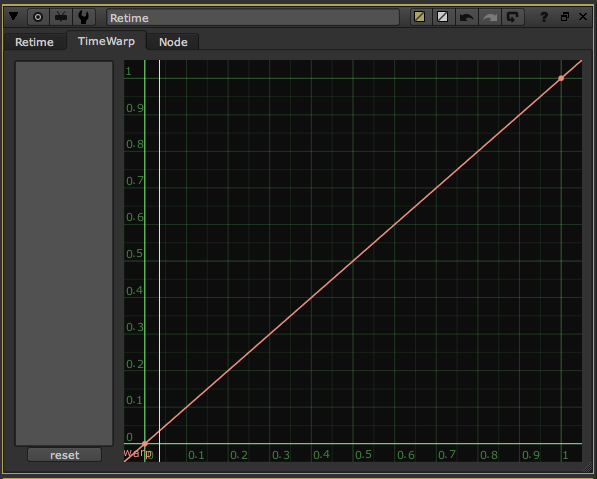
Retime node
To warp a clip.
Slow down-Speed up.
TimeBlur node
To apply motion blur to a clip.
Place it downstream from the element to which you want to apply motion blur.
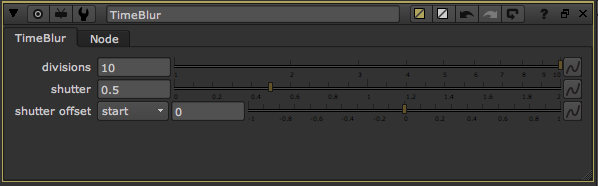
divisions
The number of times you want to sample the input over the shutter time. For images with fast-moving content higher values are necessary to eliminate “steppiness” or band- ing in the output.
shutter
YoumayfindthatusingTimeBluronalltheupstreamnodesinyourcompositioncanbeunnecessary and very time consuming. In these cases, you can use NoTimeBlur node to limit the number of nodes to which you’re applying TimeBlur. Just insert the NoTimeBlur node in your node tree above the TimeBlur and any nodes you want the TimeBlur node to process.
TimeOffset node
Moving the clip backwards or forwards in time.
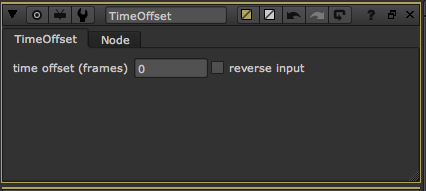
time offset (frames)
Type the number of frames by which you want to offset the clip. Enter a neg-ative value to subtract frames from the head of the clip. Enter a positive value to add frames to the head of the clip.
!Tip
- Using TimeOffset, you can also offset clips directly in the Dope Sheet.
- If you are using 3D nodes, such as cards, spheres, or cubes, together with a TimeOffset node, you can
view the object in just a specified frame range by setting the frame range control for the object, and
attaching a Viewer node to the TimeOffset node. Be sure to set the timeline range to Input to view the off-set.
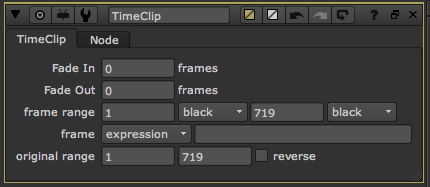
TimeClip node
Slipping a clip.
Slipping a clip refers to changing the content of the clip that is seen, but not the position or duration.
Just like TimeOffset, the TimeClip node also lets you move clips forwards or backwards in time and reverse the order of frames in a clip. Using TimeClip, you can also slip the clip directly in the DopeSheet, which can be handy if you prefer editing clips on a timeline.
Using TimeClip, you can also offset, trim, and slip clips directly in the Dope Sheet.
frame expression
Lets you enter an expression in the field on the right. The expression changes the relation between the current frame and the frame read in.
For example, if your clip begins from image.0500.rgb and you want to place this first frame at frame 1 rather than frame 500, you can use the expression frame+499. This way, 499 frames are added to the current frame to get the number of the frame that’s read in. At frame 1, image.0500.rgb is read in; at frame 2, image.0501.rgb is read in; and so on.
Another example of an expression is frame*2. This expression multiplies the current frame by two to get the number of the frame that’s read in. This way, only every other frame in the clip is used. At frame 1, image.0002.rgb is read in; at frame 2, image.0004.rgb is read in; at frame 3, image.0006.rgb is read in; and so on.
frame start at
Lets you enter a start frame number in the field on the right. This specifies the frame where the first frame in the sequence is read in. In other words, all frames are offset so that the clip starts at the specified frame.
frame offset
offset – Lets you enter a constant offset in the field on the right. This constant value is added to the current frame to get the number of the frame that’s read in.
For example, if your clip begins from image.0500.rgb and you want to place this first frame at frame 1 rather than frame 500, you can use 499 as the constant offset. This way, 499 is added to the current frame to get the frame that’s read in. At frame 1, image.0500.rgb is read in; at frame 2, image.0501 is read in, and so on.
You can also use negative values as the constant offset. For example, if you use the value -10, Nuke subtracts ten from the current frame to get the frame that’s read in. At frame 20, image.0010.rgb is read in; at frame 21, image.0011.rgb is read in; and so on.
original range
While the original range fields don’t actually affect the output of the node, they help make things clear in the Dope Sheet. Open the Dope Sheet and enter some values here and observe how they affect the TimeClip lines.
Cutting Clips
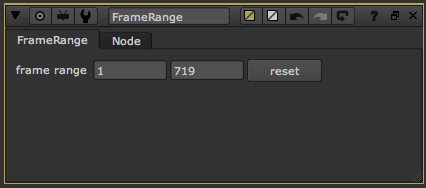
FrameRange node
To make an edit, first use this node to cut portions out of input sequences and then append the results together using the AppendClip node.
AppendClip node
To splice clips. Fading and dissolving.
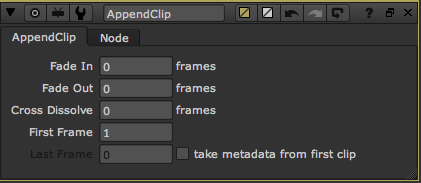
First Frame
Type the number of frames, if any, by which you want to slip the clip. Enter a negative value to subtract frames from the head of the merged clip. Enter a positive value to add frames to the head of the clip.
FrameHold node
To set the output of a clip to a particular frame or frame interval, rather than the entire clip.
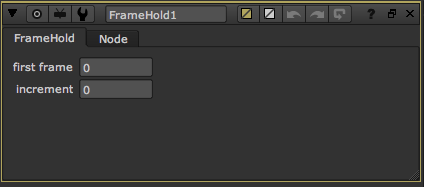
Increment
Enter the increment frames to skip at output. For example, with a first frame of 1 and an increment value of 5, the frames passed down the node tree would be 1, 6, 11, 16, etc.